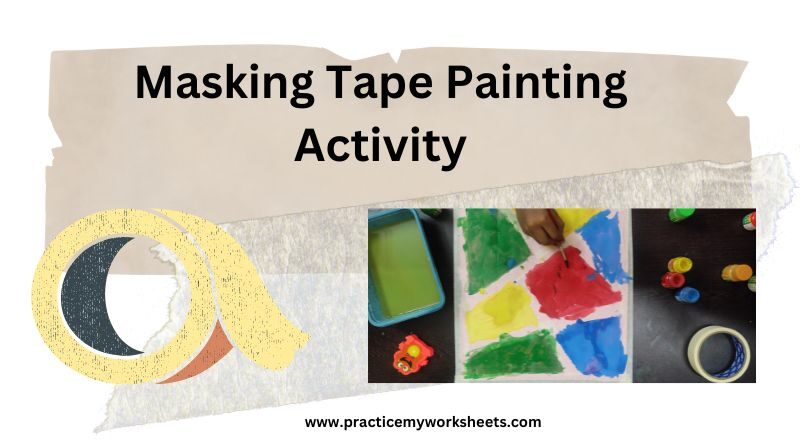
Suppose your kid is tedious and annoying! Then masking tape activity is the best thing to break their boredom. It makes them busy for a long time. It’s a nice activity so that they can play with colors. If you are thinking to introduce watercolor to your kids for the first time then this is the best activity.
How messed your kid’s paint, the art will be so nice after removing the masking tape. It helps to align the border neatly and they can form different patterns using masking tape. For Preschool and kindergarten kids guide them and stick the tape in different alignments. By doing like this they get confidence in painting and enjoy doing their work.
Things Needed
- Construction or chart paper or canvas sheet
- Masking tape
- Scissors
- Watercolors
- Brush or Sponge brush
- Cotton
- Water
Procedure
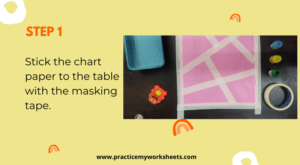
Step 1
Stick the Paper of your choice to the table with the masking tape. Stick all four corners of the sheet so that they won’t move.
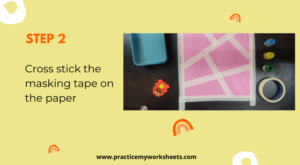
Step 2
Cross-stick the tape according to your patterns.
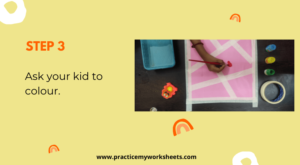
Step 3
Ask your kid to color paper with different colors. Cotton or sponge brush will make their work easier.
Step 4
Doest matter if they color over the masking tape. For toddlers and kindergarten, kids use cotton or sponge brushes.

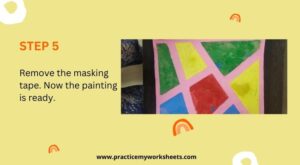
Step 5
Let the watercolor dry for a while. After some time remove the masking tape carefully. Don’t use thin paper or a4 size paper. The paper might tear while removing the tape. Now the painting is ready.
CHECK OUT OUR OTHER FUN ACTIVITY
- Playdough Mats – Fun Activity For kids | Free Printables
- 10 Fun DIY Activity for Shapes and Colors – Free worksheets
- Three Fun Activity Based On Body Parts
- 3 Fun Paper Activity for Kindergarten Kids
- Me and My Family Fun Activity | Free Worksheets
- Fingerprint Activity for Kids – Free Worksheets
- Internal organs fun activity for kindergarten kids
- Tamil Mei Ezhuthukkal | Free worksheets
- Free Printable Birthday Cards For Kids
- Grammar For Class 1 – Naming, Doing, and Describing words | Free Worksheets
PLEASE LIKE AND FOLLOW ME ON PINTEREST FACEBOOK AND INSTAGRAM
PRACTICE MAKES YOU TO EXCELLENT KEEP PRACTICING